Wireless Primer: Going Wireless in 4 Steps or Fewer
1. Make sure your laptop is wireless-capable.
- Check your manufacturer's manual, or review the instructions at
wireless.ucdavis.edu/howto.html. - If wireless hardware is not already built into your computer, you will need a wireless PC-Card or Wireless USB modem. A network card that is "802.11b WIFI compliant" is recommended. For help finding the appropriate hardware, visit the Computer Shop in the UCD Bookstore or see your local computer retailer.
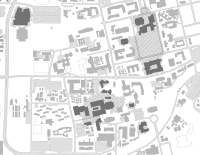 |
| Click on the Map above to view campus wireless hotspots |
2. Register your computer to access the campus wireless network.
- Visit computingaccounts.ucdavis.edu.
- Select "Ethernet (NIC) card registration" and click "Begin."
- Provide the requested information (name, ID number, and date of birth) to verify your identity.
- Select "Register a computer for DHCP" and click "Continue."
- Fill out the required information and click "Register This Address." Make sure you enter the number of the wireless card, not your Ethernet (wired) card.
3. Configure your computer.
- Configure your computer for DHCP, the protocol your computer uses to access the wireless network. If you need instructions for doing this, visit netaccess.ucdavis.edu/instruct.html and select instructions for your operating system.
4. Log on to the campus wireless network.
- Open a browser to www-wls.ucdavis.edu and enter your login ID and Kerberos password. You're set to go!
Questions? Visit the IT Express Computing Help Desk in 182 Shields Library, or email ithelp@ucdavis.edu and a consultant will help you unwire. For more information on campus wireless developments, read Tired of Wires? Got the Itch to Unhitch? Welcome to Our Wireless Campus, published in the Fall 2004 issue of IT Times.